#!/usr/bin/env python3
# -*- coding: utf-8 -*-
'''
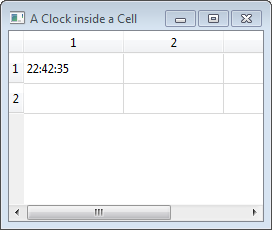
PyQt4 conversion of Qt Model-View Tutorial
The current time is displayed and updated
every second.
NOTES:
=====
A 'QTimer' is added to '__init__()'
A 'slot', 'timerHit()', is added and connected to the timer
The clock is created in 'data()'
last modified: 2012-01-27 jg
ref:
http://developer.qt.nokia.com/doc/qt-4.8/modelview.html#2-3-a-clock-inside-a-table-cell
'''
from PyQt4.QtGui import (QApplication, QTableView)
from PyQt4.QtCore import (Qt, QAbstractTableModel, QModelIndex,
QTimer, QTime, pyqtSlot)
class MyModel(QAbstractTableModel):
def __init__(self, parent=None): # initialise base class
super(MyModel, self).__init__(parent)
timer = QTimer(self)
timer.setInterval(1000) # 1 second
timer.timeout.connect(self.timerHit)
timer.start()
@pyqtSlot()
def timerHit(self):
topLeft = self.createIndex(0, 0)
self.dataChanged.emit(topLeft, topLeft)
def rowCount(self, index=QModelIndex()):
return 2
def columnCount(self, index=QModelIndex()):
return 3
def data(self, index, role):
row = index.row()
col = index.column()
if role == Qt.DisplayRole:
if (row == 0 and col == 0):
return QTime.currentTime().toString()
else:
return None
# main ========================================================================
if __name__ == '__main__':
import sys
app = QApplication(sys.argv)
tv = QTableView()
myModel = MyModel()
tv.setModel(myModel)
tv.setWindowTitle("A Clock inside a Cell")
tv.show()
sys.exit(app.exec_())
Friday, January 27, 2012
Qt 4.8 Model/View Tutorial - Part 3
The following code is based on the Qt Model/View Tutorial - 2.3 A Clock Inside a Table Cell.
Labels:
Qt Model/View Tutorial
Qt 4.8 Model/View Tutorial - Part 4
The following is based on code from the Qt 4.8 Model/View Tutorial - 2.4 Setting Up Headers for Columns and Rows.
#!/usr/bin/env python3
# -*- coding: utf-8 -*-
'''
PyQt4 conversion of Qt Model-View Tutorial
Add headers to a table view by overriding
headerData().
NOTES:
=====
Headers are shown/hidden using QTableView.verticalHeader().hide()
but they are defined in the model.
The Qt example only includes column headers, added row headers
and set row and column header text color to red.
last modified: 2012-01-27 jg
ref:
http://developer.qt.nokia.com/doc/qt-4.8/modelview.html#2-3-a-clock-inside-a-table-cell
'''
from PyQt4.QtGui import (QApplication, QTableView, QColor)
from PyQt4.QtCore import (Qt, QAbstractTableModel, QModelIndex)
class MyModel(QAbstractTableModel):
def __init__(self, parent=None): # initialise base class
super(MyModel, self).__init__(parent)
def rowCount(self, index=QModelIndex()):
return 2
def columnCount(self, index=QModelIndex()):
return 3
def headerData(self, section, orientation, role):
if role == Qt.DisplayRole:
if(orientation == Qt.Horizontal):
if section == 0: return "Column One"
elif section == 1: return "Column Two"
elif section == 2: return "Column Three"
elif(orientation == Qt.Vertical):
if section == 0: return "Row One"
elif section == 1: return "Row Two"
elif role == Qt.TextColorRole:
return QColor(Qt.red)
return None
def data(self, index, role):
row = index.row()
col = index.column()
if role == Qt.DisplayRole:
return "Row {0}, Column {1}".format(row + 1,
col + 1)
else:
return None
# main ========================================================================
if __name__ == '__main__':
import sys
app = QApplication(sys.argv)
tv = QTableView()
myModel = MyModel()
tv.setModel(myModel)
tv.setWindowTitle("Adding Headers")
tv.show()
sys.exit(app.exec_())
Labels:
Qt Model/View Tutorial
Qt 4.8 Model/View Tutorial - Part 5
The following code is based on Qt 4.8 Model/View Tutorial - 2.5 The Minimal Editing Example.
#!/usr/bin/env python3
# -*- coding: utf-8 -*-
'''
PyQt4 conversion of Qt Model-View Tutorial
In this example, we are going to build an application that
automatically populates a window title with content by repeating
values entered into table cells.
Differences from previous examples:
- uses QMainWindow to display the table
- overrides QAbstractTableModel.flags() to allow edits
- overrides QAbstractTableModel.setData()
- includes a custom signal
NOTES:
=====
Used a multidimensional list to hold the table data
(see ref link for a FAQ entry on multidimensional lists)
With the introduction of QMainWindow, a separate main()
method is once again callable without producing QTimer
errors on exit (see Part 1)
last modified: 2012-01-28 jg
ref:
http://developer.qt.nokia.com/doc/qt-4.8/modelview.html#2-5-the-minimal-editing-example
http://pyfaq.infogami.com/how-do-i-create-a-multidimensional-list
'''
from PyQt4.QtGui import (QApplication, QMainWindow, QTableView)
from PyQt4.QtCore import (Qt, QAbstractTableModel, QModelIndex,
pyqtSlot, pyqtSignal)
class MyModel(QAbstractTableModel):
ROWS = 2
COLS = 3
def __init__(self, parent=None): # initialise base class
super(MyModel, self).__init__(parent)
# create an empty, multidimensional list to hold the
# table data
self._mGridData = [ [''] * MyModel.COLS
for i in range(MyModel.ROWS)]
editCompleted = pyqtSignal(str, name="editCompleted")
def rowCount(self, index=QModelIndex()):
return MyModel.ROWS
def columnCount(self, index=QModelIndex()):
return MyModel.COLS
def data(self, index, role):
row = index.row()
col = index.column()
if role == Qt.DisplayRole:
return self._mGridData[row][col]
else:
return None
def setData(self, index, value, role):
row = index.row()
col = index.column()
if role == Qt.EditRole:
# save edit value
self._mGridData[row][col] = str(value)
# for presentation purposes, build and emit a joined string
result = ''
for row in self._mGridData:
result += ', '.join(row)
self.editCompleted.emit(result)
return True
def flags(self, index):
return Qt.ItemIsSelectable | Qt.ItemIsEditable | Qt.ItemIsEnabled
class MainWindow(QMainWindow):
def __init__(self, parent=None): # initialise base class
super(MainWindow, self).__init__(parent)
tableView = QTableView(self)
self.setCentralWidget(tableView)
myModel = MyModel(self)
tableView.setModel(myModel)
myModel.editCompleted.connect(self.showWindowTitle)
@pyqtSlot(str)
def showWindowTitle(self, title):
self.setWindowTitle(title)
# main ========================================================================
def main():
import sys
app = QApplication(sys.argv)
mw = MainWindow()
mw.show()
sys.exit(app.exec_())
if __name__ == '__main__':
main()
Labels:
Qt Model/View Tutorial
Qt 4.8 Model/View Tutorial - Part 6
The following code is based on Qt 4.8 Model/View Tutorial - 3.1 Tree View.
#!/usr/bin/env python3
# -*- coding: utf-8 -*-
'''
PyQt4 conversion of Qt Model-View Tutorial
We use QStandardItemModel, which is a container for hierarchical
data that also implements QAbstractItemModel.
To show a tree, QStandardItemModel must be populated with
QStandardItems, which are able to hold all the standard properties
of items like text, fonts, checkboxes or brushes.
NOTES:
=====
The original C++ code did not include:
stdModel.setColumnCount(COLUMNS)
so only one column was being displayed
QList is not implemented in PyQt4, a standard Python
list is used instead.
last modified: 2012-01-28 jg
ref:
http://developer.qt.nokia.com/doc/qt-4.8/modelview.html#3-1-treeview
'''
from PyQt4.QtGui import (QApplication, QMainWindow, QTreeView, QStandardItem,
QStandardItemModel)
ROWS = 2
COLUMNS = 3
class MainWindow(QMainWindow):
def __init__(self, parent=None): # initialise base class
super(MainWindow, self).__init__(parent)
treeView = QTreeView(self)
self.setCentralWidget(treeView)
stdModel = QStandardItemModel()
stdModel.setColumnCount(COLUMNS) # columns to display
# create the first row of items and assign it to the
# tree root
preparedRow = self.prepareRow("first", "second", "third")
item = stdModel.invisibleRootItem()
item.appendRow(preparedRow)
# add a second row of items to the first item in the first row
secondRow = self.prepareRow("111", '222', '333')
preparedRow.appendRow(secondRow)
treeView.setModel(stdModel)
treeView.expandAll()
def prepareRow(self, first, second, third):
# create a list of QStandardItems
items = []
items.append(QStandardItem(first))
items.append(QStandardItem(second))
items.append(QStandardItem(third))
# create a QStandardItem and add the list
# as a row
rowItems = QStandardItem()
rowItems.appendRow(items)
return rowItems
# main ========================================================================
def main():
import sys
app = QApplication(sys.argv)
mw = MainWindow()
mw.setWindowTitle("Tree View")
mw.show()
sys.exit(app.exec_())
if __name__ == '__main__':
main()
Labels:
Qt Model/View Tutorial
Qt 4.8 Model/View Tutorial - Part 7
The following code is based on Qt 4.8 Model/View Tutorial - 3.2 Working with Selections.
#!/usr/bin/env python3
# -*- coding: utf-8 -*-
'''
PyQt4 conversion of Qt Model-View Tutorial
Build a selectable tree view and update the application's
Window Title with the selected item's content and
hierarchy level.
NOTES:
=====
Tree is displayed as one expandable column.
last modified: 2012-01-28 jg
ref:
http://developer.qt.nokia.com/doc/qt-4.8/modelview.html#3-2-working-with-selections
'''
from PyQt4.QtGui import (QApplication, QMainWindow, QTreeView, QStandardItem,
QStandardItemModel, QItemSelection)
from PyQt4.QtCore import (pyqtSlot, Qt, QModelIndex)
ROWS = 2
COLUMNS = 3
class MainWindow(QMainWindow):
def __init__(self, parent=None): # initialise base class
super(MainWindow, self).__init__(parent)
self.treeView = QTreeView(self)
self.setCentralWidget(self.treeView)
stdModel = QStandardItemModel()
rootNode = stdModel.invisibleRootItem()
# define a few items
americaItem = QStandardItem("America");
mexicoItem = QStandardItem("Canada");
usaItem = QStandardItem("USA");
bostonItem = QStandardItem("Boston");
europeItem = QStandardItem("Europe");
italyItem = QStandardItem("Italy");
romeItem = QStandardItem("Rome");
veronaItem = QStandardItem("Verona");
# build the hierarchy
rootNode.appendRow(americaItem);
rootNode.appendRow(europeItem);
americaItem.appendRow(mexicoItem);
americaItem.appendRow(usaItem);
usaItem.appendRow(bostonItem);
europeItem.appendRow(italyItem);
italyItem.appendRow(romeItem);
italyItem.appendRow(veronaItem);
# register the model
self.treeView.setModel(stdModel)
self.treeView.expandAll()
# connect selection signal to slot
selModel = self.treeView.selectionModel()
selModel.selectionChanged.connect(self.selChanged)
@pyqtSlot(QItemSelection, QItemSelection)
def selChanged(self, newSel, oldSel):
# get selected item's text
index = self.treeView.selectionModel().currentIndex()
selText = index.data(Qt.DisplayRole)
# find the selected item's hierarchy level
hierLevel = 1
seekRoot = index
while seekRoot.parent() != QModelIndex():
seekRoot = seekRoot.parent()
hierLevel += 1
# update the window title
showString = "{0}, Level {1}".format(selText, hierLevel)
self.setWindowTitle(showString)
# main ========================================================================
def main():
import sys
app = QApplication(sys.argv)
mw = MainWindow()
mw.setWindowTitle("Tree View Selections")
mw.show()
sys.exit(app.exec_())
if __name__ == '__main__':
main()
Labels:
Qt Model/View Tutorial
Qt 4.8 Model/View Tutorial - Part 8
The following code is based on the Qt Spin Box Delegate Example.
#!/usr/bin/env python3
# -*- coding: utf-8 -*-
'''
PyQt4 conversion of Qt Model-View Tutorial
The Spin Box Delegate example shows how to create an editor for a
custom delegate in the model/view framework by reusing a standard
Qt editor widget.
The model/view framework provides a standard delegate that is used
by default with the standard view classes. For most purposes, the
selection of editor widgets available through this delegate is
sufficient for editing text, boolean values, and other simple data
types. However, for specific data types, it is sometimes necessary
to use a custom delegate to either display the data in a specific
way, or allow the user to edit it with a custom control.
NOTES:
=====
In the C++ code, static_casts are used to cast the
editor to a QSpinBox; this isn't necessary in Python
last modified: 2012-01-28 jg
ref:
http://developer.qt.nokia.com/doc/qt-4.8/itemviews-spinboxdelegate.html
'''
from PyQt4.QtGui import (QApplication, QMainWindow, QItemDelegate, QTableView,
QStyleOptionViewItem, QSpinBox, QStandardItemModel)
from PyQt4.QtCore import (Qt, QModelIndex)
class SpinBoxDelegate(QItemDelegate):
def __init__(self, parent=None): # initialise base class
super(SpinBoxDelegate, self).__init__(parent)
# no further initialisation required
def createEditor(self, parent, option, index):
# create an editor that restricts values from the model
# to integers between between 0 and 100
editor = QSpinBox(parent)
editor.setMinimum(0)
editor.setMaximum(100)
return editor
def setEditorData(self, editor, index):
# get the data from the model and update the editor
value = index.model().data(index, Qt.EditRole)
editor.setValue(value)
def setModelData(self, editor, model, index):
# read the contents of the spin box and update the model
editor.interpretText()
value = editor.value()
model.setData(index, value, Qt.EditRole)
def updateEditorGeometry(self, editor, option, index):
# update the editor's geometry using information
# from the style option
editor.setGeometry(option.rect)
class MainWindow(QMainWindow):
def __init__(self, parent=None): # initialise base class
super(MainWindow, self).__init__(parent)
model = QStandardItemModel(4, 2)
tableView = QTableView(self)
tableView.setModel(model)
tableView.setItemDelegate(SpinBoxDelegate(self))
tableView.horizontalHeader().setStretchLastSection(True)
# insert example data
for row in range(4):
for col in range(2):
index = model.index(row, col, QModelIndex())
model.setData(index, (row + 1) * (col + 1))
self.setCentralWidget(tableView)
# main ========================================================================
def main():
import sys
app = QApplication(sys.argv)
mw = MainWindow()
mw.setWindowTitle("Spin Box Delegate Example")
mw.show()
sys.exit(app.exec_())
if __name__ == '__main__':
main()
Labels:
Qt Model/View Tutorial
Thursday, January 26, 2012
Qt 4.8 Application Example - Part 1
This is a walk through of a conversion from C++ to PyQt4 of the Qt Developer Network Application Example. The original example isn't broken up into parts the way the tutorials were; it is broken up here to make the conversion easier to follow.
#!/usr/bin/env python3
# -*- coding: utf-8 -*-
'''
PyQt4 conversion of Qt Application Example
The Application example shows how to implement a standard GUI application
with menus, toolbars, and a status bar. The example itself is a simple text
editor program built around QPlainTextEdit.
NOTES:
=====
This is based on an 'example' vs a tutorial however I'm splitting
up the steps to make them easier to process.
This first pass handles setting up the application class based on
the examples C++ 'include' file: mainwindow.h. Empty slots and methods are
defined creating skeleton code.
The basic logic for building the application is laid out in the '__init__()'
method.
Class attributes will be created as the slots/methods are implemented.
last modified: 2012-01-25 jg
ref:
http://developer.qt.nokia.com/doc/qt-4.8/mainwindows-application.html
http://developer.qt.nokia.com/doc/qt-4.8/mainwindows-application-mainwindow-h.html
'''
import sys
from PyQt4.QtGui import (QApplication, QMainWindow, QPlainTextEdit)
from PyQt4.QtCore import (pyqtSlot)
class MainWindow(QMainWindow): # subclass QMainWindow
def __init__(self, parent=None): # initiase base class
super(MainWindow, self).__init__(parent)
# create GUI
self._createActions()
self._createMenus()
self._createToolBars()
self._createStatusBar()
# create central widget
self._textEdit = QPlainTextEdit()
self.setCentralWidget(self._textEdit)
# connect signals/slots for event handling
self._textEdit.document().contentsChanged.connect(self._documentWasModified)
# establish initial conditions
self._readSettings()
self._setCurrentFile('')
self.setUnifiedTitleAndToolBarOnMac(True)
# overridden methods ------------------------------------------------------
def closeEvent(self, evt):
pass
# private slots -----------------------------------------------------------
@pyqtSlot()
def _newFile(self):
pass
@pyqtSlot()
def _open(self):
pass
@pyqtSlot()
def _save(self):
pass
@pyqtSlot()
def _saveAs(self):
pass
@pyqtSlot()
def _about(self):
pass
@pyqtSlot()
def _documentWasModified(self):
pass
# private methods ---------------------------------------------------------
def _createActions(self):
pass
def _createMenus(self):
pass
def _createToolBars(self):
pass
def _createStatusBar(self):
pass
def _readSettings(self):
pass
def _writeSettings(self):
pass
def _maybeSave(self):
pass
def _loadFile(self, fname):
pass
def _saveFile(self, fname):
pass
def _setCurrentFile(self, fname):
pass
def _strippedName(self, fullFName):
pass
# main ========================================================================
def main():
app = QApplication(sys.argv)
app.setOrganizationName("My Business")
app.setApplicationName("Application Example")
mw = MainWindow()
mw.setWindowTitle("Application Example")
mw.show()
sys.exit(app.exec_())
if __name__ == '__main__':
main()
Labels:
Qt Application Example
Subscribe to:
Posts (Atom)
